About Me Tutorials Contact Me Via Social Media! Visit Brittany's Joy Store
Showing posts with label Master Bedroom. Show all posts

Thursday, June 6, 2013

lengthening curtains

This is part 3 of our Master Bedroom makeover. And apparently, I'm on a curtain kick.


When I first started working on our master bedroom makeover {months and months ago, as I tend to do}, I knew I wanted to "grow up" the room a bit by adding curtains. Unlike downstairs, though, which was filled with bright and modern patterns, I wanted a more classic and relaxing look for the bedroom. Solid color, lots of texture, and drama!


I fell in love with the Jadeite Chelsea curtains  from World Market. The color complemented our duvet cover so well and the burlap fabric was simply delicious,  so I purchased them on the spot.

Unfortunately, though, as soon as I brought them home I could tell it wasn't meant to be. Their 84" height kept me from hanging them high and wide around the slider {like we did here}; they hung a pathetic 13" off the ground. Truth be told, I considered hanging them anyway, since they'd be hiding  partially behind our dresser, but they really did look sad all flooded like that. So they sat.


A few weeks later, the lightbulb struck. They matched the color of our duvet color so well, and I still had a good three or four yards of the fabric left. I could extend the length of the panel using some of the leftover fabric!

I didn't like the idea of just tacking some fabric at the top or the bottom of the panel, though. I see that on blogs all the time and I'm sorry, but they just scream "HOMEMADE!!!!!" to me. I wanted something a little more professional looking. I would border the new fabric addition with the orginial hem of the curtains--I'd chop them and insert the fabric in between the burlap pieces!


A few chops of the scissors and a hem or two later, I had two completely customized curtains that don't really look homemade unless you get up really close ;)


To do something similar, here's what you'll need:
A set of too-short curtains
fabric cut to the width of the curtains+seam allowance* of whatever length you need**
Pinking shears (regular scissors will work in a pinch)
Sewing machine and Coordinating thread

*the seams on my curtain were 1/2" and I needed to fold my seams in twice, so I'd need an additional 2 inches (1" on both sides) to accommodate it.
**The length of your "patch" fabric will depend on how you wish to attach the fabric. I decided that I would do a modified french seam to encase all raw edges of fabric and burlap. This would add an additional 1.5" to either side, plus another 1" for the seams I'd be losing in the burlap. This meant that I cut a panel of 17" to accommodate my 13" panel and 4" seam allowance!

Step 1
Choose the desired placement for your contrasting stripe of fabric in your curtains. For me, that "sweet spot" fell just eight inches above the hem. Cut your curtain there, adding a 1/2" inch for seam allowance.


Step 2. 
Hem the sides of your contrasting fabric, mimicking the hem in your curtain. Fold the fabric over twice and sew.
Step 3.
Pin your fabric to the bottom piece of your curtain, wrong sides together. Sew with a little less than a 1/2" seam allowance {It worked for me to set the fabric in my machine to 1/2" but move the needle a little closer to the edge}.

Step 4. Lay the seam flat. Flip the contrasting fabric over and around the seam so that the pieces are now right sides together, keeping the curtain fabric flat {the contrasting fabric should be doing all the folding}.  Iron, pin, and sew.
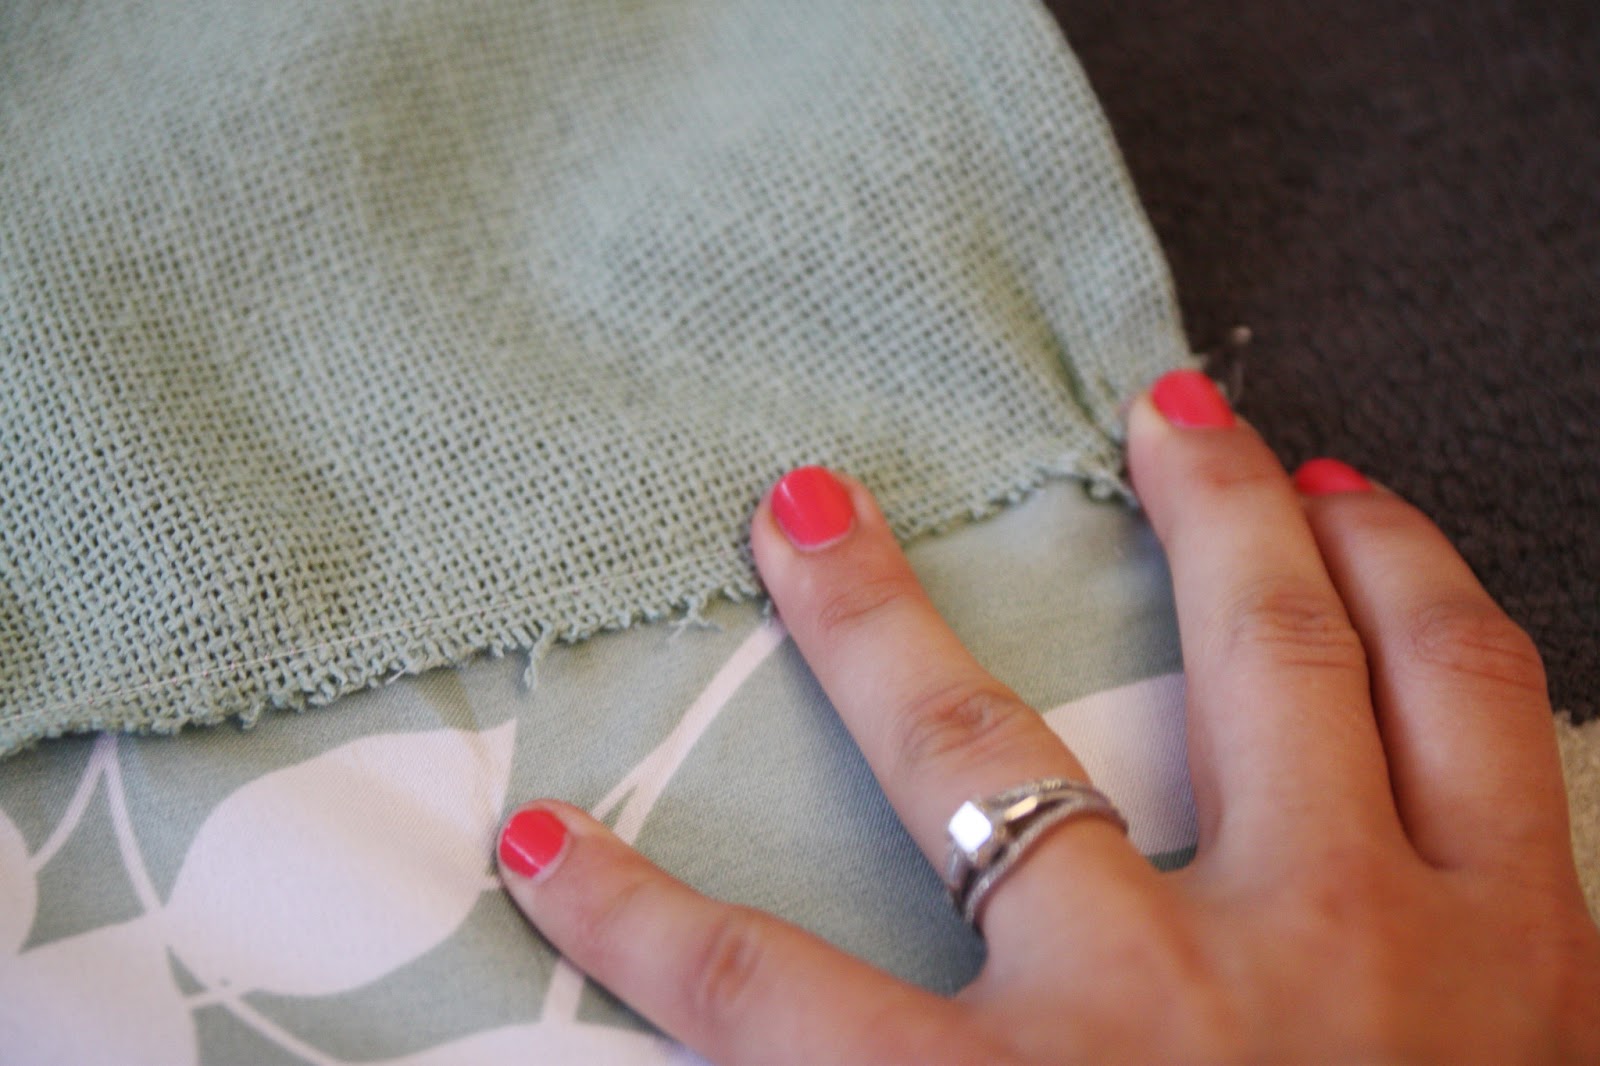
lay seam open flat, wrong side down...
fold fabric over...
then flip the pile, pin, and sew!
{closeup of the folding process}

This is a modified french seam, which essentially encases all of the raw edges inside a protected seam. While time consuming, it gives an incredibly strong connection between the fabric, and ensures that the fabric will not fray if it goes through the wash.


It also has the benefit of looking a whole heckuva lot more professional than a raw and fraying seam, which is helpful should someone peek at the back of the curtain, too.

Step 5. 
Repeat step 3 and 4 to connect the new bottom portion of your curtain to the top.


Tadaaa!


I used clip rings to hang this curtain (the same ones I used downstairs), but this time I used them to faux some pinch-pleats like Sarah from TDC does here. They just look a whole heckuva lot more luxurious that way, don't they?

Timesaving tips:
Work on both curtains at the same time. This allows you to fall into a routine and get the hang of the flipping and folding and ironing and pinning before having to change gears and move onto the next thing. It saved me a ton of time to not have to constantly change gears.
Sew continuously! This is my new favorite tip, and I heard it from a woman who used to sew in a factory for her living. If you're sewing a bunch of individual pieces at the same time, rather than cutting the fabric and starting a whole new thread, start sewing your second piece immediately after the first one. You can cut them apart afterwards. This saves both time and thread, which means you're less likely to have to run out of your bobbin thread in the middle of a project. Genius!


In all, this project took just a couple hours; the longest part was ironing everything so much! I really wanted to do this right, though, so the extra time was worth it. 

What do you think? Is this something that you would do in your house? What combination would you choose? So many possibilities!

Tuesday, June 4, 2013

creating an "oasis space" in your home


This is our retreat, our oasis. When everything in the house is insane and crazy, this is where we go to escape it. 

How do we keep it that way? Lots of hard work and determination, that's how! 

Seriously, though, five simple rules have helped us keep our space the way we want it. Keep in mind, everyone's different; these were just the rules that worked for us! 

1) Last person out of it has to make the bed. Throw pillows are not an option, but a requirement.

Turns out, my mom was right about this all along. It sounds silly, but this little habit has really changed the feel of the room. An unmade bed just looks messy and unkempt; not exactly the most relaxing thing. We want fresh! clean! The simple task of pulling the covers up and tossing the pillows back onto place makes the centerpiece of the room look well cared-for, and therefore relaxing. Works for us, anyway. It's like a hotel room: You think less of the place if your bed hasn't been made. And the pillow thing comes from hotel rooms, too; you'd never catch a nice hotel room without at least a sham pillow. Step it up; make it look nice.

Headboard and duvet cover were both early diys on the blog
2) Bedrooms are project-free zones.

Projects were the biggest cause for clutter in our room, and clutter isn't a good addition to a sanctuary! So, we kicked projects out for good. Here's the kicker, though: "project-free" includes no folding laundry {GASP!}.

I'm going full-disclosure on this one. In the past, we've been really bad about laundry. We'd only do a load about every other week, and since we were doing such GIGANTIC loads we just would run out of steam halfway through the folding process and it would all just end up in a pile. This "clean clothes pile" would collect in the corners of our room, and since the laundry bins themselves were stuffed full of dirty clothes, they'd eventually get mixed up and we'd be washing over and over and over........ Ugh.


The {boring as heck} solution that works for us: Suck it up and do a load every day {or every other day if we don't go through clothes quickly}. We have two 16-gallon Sortera recycling bins that we use as laundry bins, and they're out in plain sight in our room. We tried hiding them in the closet, but for us it seems to be out of sight, out of mind! So far, these unsightly things have been the only way we've been able to control our laundry situation. Tim brings one down and starts a load of laundry before he goes to work, I switch it to the dryer when I leave an hour later, we both fold it when we get home. BUT! The folding occurs either in the laundry room or the living room. It's never allowed in the bedroom unless it's being put immediately away. We've been doing this for about three months and it's kept our room laundry pile-free.


3) No TVs allowed.

If I watch TV in bed, I can't go to sleep in it. Plus, TVs in the bedroom are a distraction from more important things. Enough said.

4) Be intentional about the decor in the space. Make it personal and uniquely YOU. If you're short on space, make it functional, too.

For us, the best way to cut clutter was to "style" the surfaces of the room {that's really just a fancy bloggy word for decorate}. If a space or surface looks just so, I'm a lot less likely to leave my stuff there, where it doesn't belong. One or two things out of place sticks out like a sore thumb; lots of things out of place {or no "place" at all} and we just don't notice it anymore. So do it! Plus, it makes for something pretty to wake up to!

I picked colors that were inherently relaxing to Tim and I, and chose items for our dresser top that were both aesthetically pleasing as well as sentimental.  Shop both your home and the internet for inspiration. This step is important to make sure that the things you want to use will actually look good together! I created a "mood board" to make sure that it was all coherent. Pinterest is good for that, although I still am pretty partial to saving images in a file on my computer.

{1}  {2}  {3}  {4}  {5} {6} {7} {8} {9}

Pretty, right? Armed with that inspiration, I shopped my house first for items that would work, and then purchased a few things to tie it all together.


I'll revisit this mini gallery wall later this week, but here's one word that sums it up pretty wekk: FREE. The little silver tray holding the candles was a gift from a client back in our catering days {swanky, right?}, and clustered pillar candles coupled with our glitter monogram remind me of the ones we used at our wedding. Personal items.


Also in the room, we have a giant PremiƤr canvas from Ikea {from Tim's college days}, and this cute little nightstand {from my college days}. Both of these things remind us of time shared at our respective apartments and brings together our past and present. 


I swapped out the wooden pulls on the dresser for these fun bubble glass handles from World Market {in-store only}, which tie in the color of the duvet as well as the other blues from all around the room to make everything feel more coherent. You'll also notice that the lamp in our room is different than the lamp in my inspiration photos--more about that beauty tomorrow.


5) Last but not least: In order to feel different, your room needs to smell different. 

The last way we created our sanctuary was through scent. Scent is so strongly tied to mood and memory, so our bedroom has a deliberately chosen scent that's in direct contrast with the rest of the house, so that it feels like you're leaving one world to enter another. The rest of our house smells like whatever candle we happen to be perpetually burning, but we tend to lean towards the more"relaxing" scents in our room {bergamot, sage, patchouli, sandalwood, ylang ylang, random florals. Lavender is supposed to be relaxing too, but I can't STAND it}. 

The current one we're loving right now is Bamboo by Nest. We're not normally prone to impulse-buys, but we couldn't resist it after walking into a furniture store and being enchanted by the store's "signature scent". It smelled SO good that we bought the "culprit" right on the spot, despite its $38 price tag. You guys, it was Worth. Every. Penny. It has been three months since we purchased it and it's still going strong. It's lasted way longer than a candle would, at the rate we burn candles. And isn't the diffuser pretty?

Having a signature scent for our room makes it feel extra luxurious, too, which is an added bonus! 

What about you? What "rules" do you live by in order to keep your space a sanctuary?

LinkWithin

Related Posts Plugin for WordPress, Blogger...