About Me Tutorials Contact Me Via Social Media! Visit Brittany's Joy Store
Showing posts with label Pinterest Challenge. Show all posts

Tuesday, June 4, 2013

creating an "oasis space" in your home


This is our retreat, our oasis. When everything in the house is insane and crazy, this is where we go to escape it. 

How do we keep it that way? Lots of hard work and determination, that's how! 

Seriously, though, five simple rules have helped us keep our space the way we want it. Keep in mind, everyone's different; these were just the rules that worked for us! 

1) Last person out of it has to make the bed. Throw pillows are not an option, but a requirement.

Turns out, my mom was right about this all along. It sounds silly, but this little habit has really changed the feel of the room. An unmade bed just looks messy and unkempt; not exactly the most relaxing thing. We want fresh! clean! The simple task of pulling the covers up and tossing the pillows back onto place makes the centerpiece of the room look well cared-for, and therefore relaxing. Works for us, anyway. It's like a hotel room: You think less of the place if your bed hasn't been made. And the pillow thing comes from hotel rooms, too; you'd never catch a nice hotel room without at least a sham pillow. Step it up; make it look nice.

Headboard and duvet cover were both early diys on the blog
2) Bedrooms are project-free zones.

Projects were the biggest cause for clutter in our room, and clutter isn't a good addition to a sanctuary! So, we kicked projects out for good. Here's the kicker, though: "project-free" includes no folding laundry {GASP!}.

I'm going full-disclosure on this one. In the past, we've been really bad about laundry. We'd only do a load about every other week, and since we were doing such GIGANTIC loads we just would run out of steam halfway through the folding process and it would all just end up in a pile. This "clean clothes pile" would collect in the corners of our room, and since the laundry bins themselves were stuffed full of dirty clothes, they'd eventually get mixed up and we'd be washing over and over and over........ Ugh.


The {boring as heck} solution that works for us: Suck it up and do a load every day {or every other day if we don't go through clothes quickly}. We have two 16-gallon Sortera recycling bins that we use as laundry bins, and they're out in plain sight in our room. We tried hiding them in the closet, but for us it seems to be out of sight, out of mind! So far, these unsightly things have been the only way we've been able to control our laundry situation. Tim brings one down and starts a load of laundry before he goes to work, I switch it to the dryer when I leave an hour later, we both fold it when we get home. BUT! The folding occurs either in the laundry room or the living room. It's never allowed in the bedroom unless it's being put immediately away. We've been doing this for about three months and it's kept our room laundry pile-free.


3) No TVs allowed.

If I watch TV in bed, I can't go to sleep in it. Plus, TVs in the bedroom are a distraction from more important things. Enough said.

4) Be intentional about the decor in the space. Make it personal and uniquely YOU. If you're short on space, make it functional, too.

For us, the best way to cut clutter was to "style" the surfaces of the room {that's really just a fancy bloggy word for decorate}. If a space or surface looks just so, I'm a lot less likely to leave my stuff there, where it doesn't belong. One or two things out of place sticks out like a sore thumb; lots of things out of place {or no "place" at all} and we just don't notice it anymore. So do it! Plus, it makes for something pretty to wake up to!

I picked colors that were inherently relaxing to Tim and I, and chose items for our dresser top that were both aesthetically pleasing as well as sentimental.  Shop both your home and the internet for inspiration. This step is important to make sure that the things you want to use will actually look good together! I created a "mood board" to make sure that it was all coherent. Pinterest is good for that, although I still am pretty partial to saving images in a file on my computer.

{1}  {2}  {3}  {4}  {5} {6} {7} {8} {9}

Pretty, right? Armed with that inspiration, I shopped my house first for items that would work, and then purchased a few things to tie it all together.


I'll revisit this mini gallery wall later this week, but here's one word that sums it up pretty wekk: FREE. The little silver tray holding the candles was a gift from a client back in our catering days {swanky, right?}, and clustered pillar candles coupled with our glitter monogram remind me of the ones we used at our wedding. Personal items.


Also in the room, we have a giant PremiƤr canvas from Ikea {from Tim's college days}, and this cute little nightstand {from my college days}. Both of these things remind us of time shared at our respective apartments and brings together our past and present. 


I swapped out the wooden pulls on the dresser for these fun bubble glass handles from World Market {in-store only}, which tie in the color of the duvet as well as the other blues from all around the room to make everything feel more coherent. You'll also notice that the lamp in our room is different than the lamp in my inspiration photos--more about that beauty tomorrow.


5) Last but not least: In order to feel different, your room needs to smell different. 

The last way we created our sanctuary was through scent. Scent is so strongly tied to mood and memory, so our bedroom has a deliberately chosen scent that's in direct contrast with the rest of the house, so that it feels like you're leaving one world to enter another. The rest of our house smells like whatever candle we happen to be perpetually burning, but we tend to lean towards the more"relaxing" scents in our room {bergamot, sage, patchouli, sandalwood, ylang ylang, random florals. Lavender is supposed to be relaxing too, but I can't STAND it}. 

The current one we're loving right now is Bamboo by Nest. We're not normally prone to impulse-buys, but we couldn't resist it after walking into a furniture store and being enchanted by the store's "signature scent". It smelled SO good that we bought the "culprit" right on the spot, despite its $38 price tag. You guys, it was Worth. Every. Penny. It has been three months since we purchased it and it's still going strong. It's lasted way longer than a candle would, at the rate we burn candles. And isn't the diffuser pretty?

Having a signature scent for our room makes it feel extra luxurious, too, which is an added bonus! 

What about you? What "rules" do you live by in order to keep your space a sanctuary?

Friday, May 24, 2013

no sew, no hem curtains // diy

Friends, meet my new curtains.
{I think I'm in love with them}
After almost two years in this apartment, I think I may have nailed a window treatment that works for our lovely living room bay window. Took long enough!
We are seriously blessed to have three lovely bay windows in our apartment. HOWEVER, I couldn't for the life of me find a way to treat them without making them look like they belonged in a) a grandmother's house or b) 1994.  My landlady had left some hardware around the window, so for the past year-plus a piece of sheer swoopy fabric was awkwardly framing the one in our living room.

{I cringe at having to use this picture again, but it's the only one that actually shows what we were working with window treatment-wise:} 
There's a lot that I would love to change about this room, but the swag-thing was the first and the easiest thing to go. It was just so awkward! Not my thing at all. I switched it out for a garland at christmastime, and "forgot" to put it back up afterwards.

The window really did need something though, so I got to thinking. Was there a way I could treat the window to make it really stand out as an architectural centerpiece?
To Houzz, Pinterest, and Google I went. {Click on the photos for sources}


LOVE. 
One thing kept popping up: flanking curtain panels. I totally dug how framing a large window with floor-to-ceiling curtains made the window look larger and wider, and the final result made the whole room more polished. Sold!


I searched for some fun patterned fabric (that would work with the fabric I had already chosen for the yet-to-be-started pillow project), and settled on a twill print from Fabric.com that was $7.50 a yard. I liked that it was colorful, the print was busy but not overbearingly so, and it was 100% cotton and medium-weight which would give me nice quality curtains. Added bonus: the bolt was wide enough to use one width per panel.

Because here's the thing: I wanted this to be quick and dirty. This was going to be a no-sew project, and not the kind of "no sew" that uses iron-on hem tape instead of sewing. Nope, no hemming whatsoever. I wanted to surprise Tim with the project and he was en-route from Tahoe--I only had a couple hours.


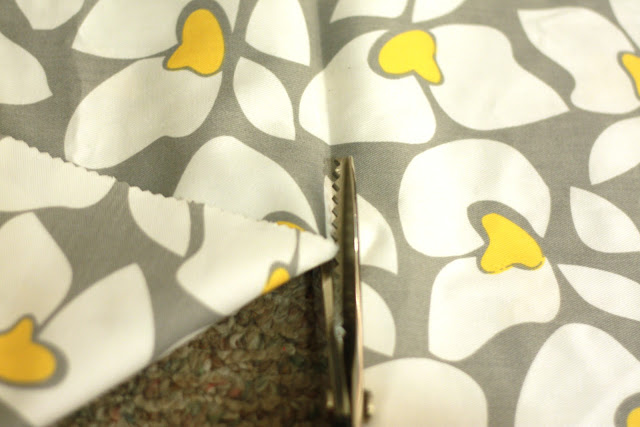
Since we wanted floor-to-ceiling curtains, I measured the height of our wall {taking into account the space for the curtain rod} and added in an extra few inches for safety. Normally, the extra inches would be for hemming, but I wouldn't be hemming these babies! Our height came out to 98", so I folded the excess fabric over until we had 98" showing{see photo above}, then creased a fold into the fabric and cut it with pinking shears to minimize fraying.


The fabric was 57" wide, so to make my life easier, I decided that I really liked the look of 57" wide curtains. No problems there :)

I used clip rings rather than sewing a spot for the curtain rod because a) I had them, and b) no sewing allowed on this project, remember?! I folded the top edge over twice {enclosing the raw edge on the inside}, hit it with an iron {keeping in mind the ironing lessons learned over here}, and then clipped the rings right on top to hold the fold in place. EASY.


The panels have 9 rings each. The corners also got folded under twice on the sides before they were clipped in place, to slightly hide the selvedge edge. And that's all there is to it!


Next, the hardware. I wanted flanking panels, not functioning ones, so two short rods on either side of the window was perfect for our purposes. I just wanted curtains that would hang there and look pretty, like a trophy wife....err curtains! Our apartment is a veritable junkyard of drapery hardware {thanks to our previous tenant who had a penchant for leaving stuff behind}, so I picked two rods that were relatively similar in diameter and long enough to flank the windows with a little overhang, and hacksawed the longer one down to size. Right. on. the. carpet.

{Tim wasn't thrilled about that one when he got home. I vacuumed right after though!}


I hung the rods as high as I could get them, and--Viola--basked in the awe of my bright and lovely new curtains.

The curtains pool on the floor ever so slightly. I actually dig it.

As of now, the rods are finial-less, so I'm keeping my eye open for something small and nondescript I can use for that. Some pretty knobs might work, although maybe I'll decide that the "bare bones" thing is hip or something. I also have some framed prints that will hang in the space above the window, between the curtains.


During the summer, we keep the bird's cage down here because the guest room turns into a sauna; we're looking for a better spot for it. For now, though, it's part of the decor? haha

Next step: like a million Pillows. Oh mercy.

This project was part of my Pinterest Challenge! {see all of my completed projects here}. Even though I didn't finish all six projects in six weeks, I've decided to keep the "Pinterest Challenge" tag-- all pinterest-inspired projects will be filed under there!

Thursday, March 7, 2013

let the light shine in // a renter-friendly diy

Oh hey Neighbor! Nice to {not} see you!


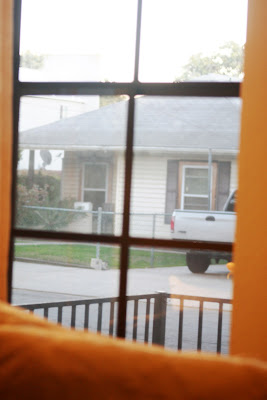
We live in the front unit of a street-level apartment, which means unless we want our living room to be a fishbowl, we have to keep curtains drawn and blinds closed pretty much all the time.  While it is nice for privacy, it's so.dang.dark down there. We don't get very much natural light in the downstairs part of the house, so it's a huge bummer to block what light we do get.

So I took matters into my own hands: I frosted most of the windows on our first floor.  And I used this:


Yep, you're reading that right: that's "transparent" Contact Paper. Believe it or not, that stuff isn't actually clear, but opaque. Perfect to allow elusive light {and not the neighbors} to peek into our living room. I got my paper here; it cost me about 11 bucks for a 24 feet long roll (we had a LOT of windows to cover). I bought two rolls and have lots leftover.

Now, we can leave blinds up always! It's difficult to capture in a photograph, but the difference in light is unbelievable. It diffuses throughout the room and is so happy and cheery!


And it's actually a whole lot easier to apply without tacky bubbles than you might think, too. Here's what you need:
Materials


Clear contact paper, cut to the size you need {read on to see how to "cover" a window that's larger than your contact paper roll};  Window spray; scraping tool {I used a gift card}.
Step 1. First, clean your windows. If there's even a speck of dust or fuzz, it will show, and that's tacky. Clean it well.
Step 2. Spray the pane with cleaning solution (yes, again). Really get it wet.
Step 3. Peel backing off your paper and place on window, over the solution. This will allow you to move it around in case you don't get the placement right the first time. Trim the edges more if necessary. Once you have it placed correctly, begin smoothing out the windex bubbles out. Start from the middle and move outward. You'll have to have a rag ready to clean up the windex drips. Go slowly and it won't be too bad!

bad pics, but you get the point :)

That's it! If the corners don't seem to want to stick, wait a few minutes and hit it with a blow dryer. It'll soften the adhesive and peel up a little, but it smoothes right back down with your credit card. The paper may look cloudy and irregularly colored as the remaining solution evaporates away but that will even out after a day or so (seen at the top of this below photo).

One last tip. We have a large bay window in the kitchen to which I wanted to give this same treatment. Problem: it was way wider and taller than our roll. So, I cut out tesselated shapes from the vinyl that would look good with just a little space between them. Embrace those mandatory seams! I chose a simple square pattern, although a morrocan tile (below) would look pretty too. For me, simple was better. This took long enough!
my version, as seen on instagram // quatrefoil pattern via 7th House on the Left

This is totally renter-approved since removal is so easy: just peel a corner and pull off! If it has trouble coming off, again: shoot with a blow dryer. I had to prove this to my dear husband that it was actually removable before he let me do this to our front windows, so I know it works. I left some up on a mirror for a month before I tested the removal, and there were no issues.  I'm nothing if not thorough :)

I love this little trick, and love the change it's brought to our front room. In the summer it's the coolest room of the house; I'm excited to actually want to be down there!

Oh, and in case you're wondering, this is how much you can see from outside at night:


 That greenish blob in the left-hand picture is Tim in front of the couch.
Anything not up against the window (like the bottles on the right) are really hard to see)
Love it.

This was my second project for the Pinterest Challenge. My first project {the framed bunting} will be revealed in a later post. So far, so good!

LinkWithin

Related Posts Plugin for WordPress, Blogger...