{I think I'm in love with them}
After almost two years in this apartment, I think I may have nailed a window treatment that works for our lovely living room bay window. Took long enough!
We are seriously blessed to have three lovely bay windows in our apartment. HOWEVER, I couldn't for the life of me find a way to treat them without making them look like they belonged in a) a grandmother's house or b) 1994. My landlady had left some hardware around the window, so for the past year-plus a piece of sheer swoopy fabric was awkwardly framing the one in our living room.
{I cringe at having to use this picture again, but it's the only one that actually shows what we were working with window treatment-wise:}
{I cringe at having to use this picture again, but it's the only one that actually shows what we were working with window treatment-wise:}
The window really did need something though, so I got to thinking. Was there a way I could treat the window to make it really stand out as an architectural centerpiece?
To Houzz, Pinterest, and Google I went. {Click on the photos for sources}
LOVE.
I searched for some fun patterned fabric (that would work with the fabric I had already chosen for the yet-to-be-started pillow project), and settled on a twill print from Fabric.com that was $7.50 a yard. I liked that it was colorful, the print was busy but not overbearingly so, and it was 100% cotton and medium-weight which would give me nice quality curtains. Added bonus: the bolt was wide enough to use one width per panel.

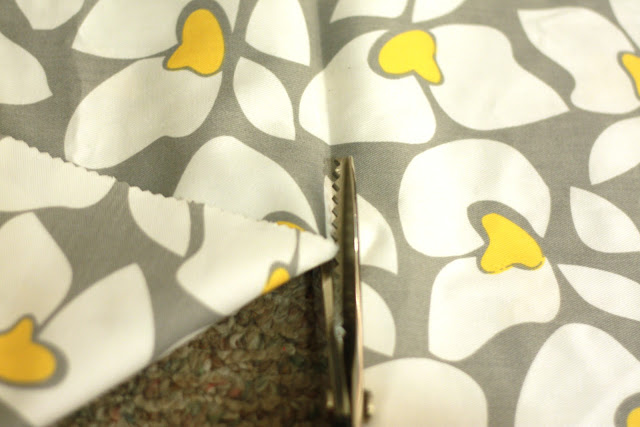
Since we wanted floor-to-ceiling curtains, I measured the height of our wall {taking into account the space for the curtain rod} and added in an extra few inches for safety. Normally, the extra inches would be for hemming, but I wouldn't be hemming these babies! Our height came out to 98", so I folded the excess fabric over until we had 98" showing{see photo above}, then creased a fold into the fabric and cut it with pinking shears to minimize fraying.
The fabric was 57" wide, so to make my life easier, I decided that I really liked the look of 57" wide curtains. No problems there :)
I used clip rings rather than sewing a spot for the curtain rod because a) I had them, and b) no sewing allowed on this project, remember?! I folded the top edge over twice {enclosing the raw edge on the inside}, hit it with an iron {keeping in mind the ironing lessons learned over here}, and then clipped the rings right on top to hold the fold in place. EASY.
The panels have 9 rings each. The corners also got folded under twice on the sides before they were clipped in place, to slightly hide the selvedge edge. And that's all there is to it!
Next, the hardware. I wanted flanking panels, not functioning ones, so two short rods on either side of the window was perfect for our purposes. I just wanted curtains that would hang there and look pretty, like a trophy wife....err curtains! Our apartment is a veritable junkyard of drapery hardware {thanks to our previous tenant who had a penchant for leaving stuff behind}, so I picked two rods that were relatively similar in diameter and long enough to flank the windows with a little overhang, and hacksawed the longer one down to size. Right. on. the. carpet.
{Tim wasn't thrilled about that one when he got home. I vacuumed right after though!}
I hung the rods as high as I could get them, and--Viola--basked in the awe of my bright and lovely new curtains.
As of now, the rods are finial-less, so I'm keeping my eye open for something small and nondescript I can use for that. Some pretty knobs might work, although maybe I'll decide that the "bare bones" thing is hip or something. I also have some framed prints that will hang in the space above the window, between the curtains.
During the summer, we keep the bird's cage down here because the guest room turns into a sauna; we're looking for a better spot for it. For now, though, it's part of the decor? haha
Next step: like a million Pillows. Oh mercy.
This project was part of my Pinterest Challenge! {see all of my completed projects here}. Even though I didn't finish all six projects in six weeks, I've decided to keep the "Pinterest Challenge" tag-- all pinterest-inspired projects will be filed under there!


They're even cuter in person--that busy print is delicious.
ReplyDeleteSo cute! Love it!
ReplyDeleteAdorable :) LOVE them! Good job!!!
ReplyDeleteYou did well. The choice of blinds and everything looks awesome.
ReplyDelete