About Me Tutorials Contact Me Via Social Media! Visit Brittany's Joy Store
Showing posts with label Taking Rentership. Show all posts

Thursday, January 30, 2014

Minty fresh

Our dining room has seen the most changes since I moved into our little townhouse about two and a half years ago. That may not be saying a whole lot because we rent (and don't really have a ton of disposable money to buy more furniture to give rooms makeovers that way) so there haven't been a whole lot of transformations that we could do, period, but still. 

We made over a table and chairs (all of which were roadside rescues).
made-over table // upholstered chairs
2) We have switched out light fixtures:
swap out chandeliers
old chandy // our painted one
3) We painted an accent wall (our bedroom is the only other room that we have painted) 4) and have moved furniture around to make better use of the space. Both changes are shown  below.
HOWEVER. Things still weren't quite right, and we realized recently that it was the dining room table we had. While it brightened up the space and we really liked it, it felt GIGANTIC in the dining space (especially when the chairs were pulled out); It was definitely intended for use in a larger room than we had. Our dining area isn't even really a room, just a shoot-off from our kitchen area, and is narrow. That size table just wasn't practical there, especially if you added in space for a walkway, chairs, and the storage console. Things just felt a little too snug; even a few extra inches would have done the trick.

It wasn't high on our priority list, but we kept an open eye for anything that we thought might fit better. A square table, a round one maybe? Who knows. Our minds were open. 

But then, on a trip to visit my parents' house (waaaaaaaay back in the summer), the heavens opened and shone down upon us. A neighbor was clearing out his garage and was getting rid of a perfect little rectangular table.
Cute, right? It was of tempered glass and solid-wood construction, so it was nice and sturdy, and the size was a lot better in the space (it's hard to tell in that above picture, but it's true!). It was a couple inches smaller on either side than the white monster we'd been using, and yet still could seat four comfortably. More than four, actually, when you pulled out the ends to reveal the hidden roll-top leaves...!  
Bizarre as heck! I'd never seen anything like it. We couldn't leave without it (Thanks, Terry and Dawn!).We had big plans for this little guy. We were going to add some color into the equation! Here's a sneek peek:
First up: get rid of the dinged and scratched-up spray paint job.

Wednesday, June 5, 2013

seaglass lamp // diy

 
Thanks for the sweet response to my post the other day! We've worked hard to keep our room a sanctuary {I am NOT normally a tidy "everything has its place" kind of girl and it's taken a lot of training. Ask anyone who's ever lived with me ever}.


Today I'm going to talk to you about our beautiful table lamp. I had been enchanted by seaglass bottle lamps for years, but couldn't bring myself to pay the money for them. Those things are EXPENSIVE! Take a look at the pretty pricey pieces (click on the photos to view source):
Regina Andrew Table Lamp Macysmiro table lamp at Circa lightingBlue-Green Recycled Glass Lamp at Horchow
Capri #2 Table Lamp by Jonathan AdlerClarity Blue Table Lamp at Crate & BarrelRegina-Andrew's Seeded Glass Table Lamp at Horchow
Integrity Table Lamp, Bayberry at Macy'sJamie Young's "Deauxville" Lamp at HorchowLinden Street™ Smoke Seeded Glass Table Lamp at JCPclear glass table lamp at Ethan Allen
 
Side note: Can someone please tell me why table lamps are so.dang.expensive?! Moving on.

I obviously wasn't going to fork over $100-500 for any of those lamps, so it crossed my mind briefly to try to make one using a glass bottle. That dream was dashed quickly: anything I found was either too cheap-looking, too small, too expensive, or all 3. I set my desire for a glass lamp aside and moved on with my life. Couldn't do it: Case closed. 

However! Almost a year later, it was in the candle aisle of World Market where I was struck with a new kind of inspiration: pillar candle holders! There were tons to choose from, including a delightful sea-glass color in three different heights. I chose the medium-sized one, which was twenty bucks. That, plus a $10 lamp kit from the hardware store and a shade I already had, was a price I could handle. 
 back when our wall was only partially painted
Now, it's the centerpiece to my pretty seaglass-themed dresser top, and I couldn't be happier. It also has the added bonus of being skinnier and taller than the other lamps I was considering, which means more impact for less surface area. Whoo! 

This tutorial is long, but I promise you it's easy as pie. Easier. Pie is actually not that easy. 

To do something similar, you will need:
*this may go without saying but I'll say it anyway: if your lamp kit is a harp kit, then you'll need a harp shade. If your kit does not have a harp, you'll need the kind of shade that sits below the bulb. 
**Optional. If you use this, you will also need a sink/water source, masking tape, a pen, and a drill. 
***I ended up painting my cord with acrylic paint since the standard brown color was ugly. DON'T SPRAY PAINT IT, the paint will NEVER cure. 

Step 1: Drill a hole through glass
We debated french-wiring our lamp {having the cord sticking out from underneath the bulb}, but ultimately decided that we liked the look of the cord threaded through the glass. Because of this, we needed to drill a hole in the bottom for the cord to escape. Here's the bit we used:


It's a glass and tile bit, and it bores a hole by slowly scraping "layers" of glass off. {doesn't it look like a little arrowhead? So cute}. This size cost us about 10 bucks, but I already have other projects planned for this puppy, so the cost was "justified". 
 

This was our setup. Decide where you want your cord to escape and cover it with a little tape (This helps keep your bit in one place when you begin so you don't scratch the glass). Mark your spot, and start drilling!


After a few moments, wet the entire area with water. This will reduce friction on the glass as well as contain the glass dust, which isn't good to inhale. It also clears stuff away so you can see how far you have to go.


I started on a low speed but pumped it up a little once I got comfortable. The key is keeping the area damp and DO NOT APPLY TOO MUCH PRESSURE, otherwise the glass will crack.

The man at the hardware store assured me that if the glass cracked, it would only form "star-fractures" rather than actual huge shattering cracks if something went wrong, though, so keep that in mind. If you're worried about cracking, apply a piece of duct tape rather than masking tape, and it should withstand the water. 


That up there? That was the teeny hole I had after a minute of drilling.The process is a long one (it took us about 20-30 minutes), but it's simple. I did have to change batteries on the drill twice and take turns with Tim because our hands kept cramping up. But anyway.


I drilled on a spot that wasn't very flat, so there was some chipping, but nothing a little silicone can't fix. Now you have an "almost perfect" hole, and you're ready to wire your lamp! 

Step 2: Creating a stable surface for your lamp kit
Our candlestick had a wide opening that went all the way down the stick, so we needed to create a stable surface for the lampshade and bulb to rest on. 

I used a "pipe cover", a length of threaded pipe, a couple washers, and some hex nuts. It's not the prettiest thing in the world, but it will be covered by the shade so it doesn't matter. 


I then dabbed a little glue to the edges of the pipe cover and placed it on the lamp. Make sure to thread the wire through the lamp and pipe before you glue it, or it will be impossible to get through after the glue is dried :)


I used E6000 glue to attach the lamp kit to the candle base. 
Actually, first we tried using glass epoxy glue, but SOMEONE *coughTIMcough* didn't read the instructions before gooping the stuff everywhere and we had some massive drippage because it never really cured... No amount of scraping or scrubbing seemed to help so I ended up having to plug all the holes in the candlestick, pour an entire bottle of acetone nail polish remover inside {thank you dollar store; acetone or paint thinner is the only thing that will remove epoxy glue}, and let it sit for an entire weekend, rotating the stick occasionally so that the whole inside got treated. Ridiculous.


This was the cleanest we could get it. So, do it right the first time. Go easy on the glue. A little goes a long way. And use the right glue. I ended up going with E6000, and it was perfect.

This was my "rig" to keep the lamp kit upright as the glue dried. It worked pretty well!

Step 3: Wire your lamp, using the instructions given in the lamp kit.
Every lamp kit is different, but the general idea is the same. 


Tie an "underwriter's knot" {above} in the wire poking through the lamp kit before attaching the wires to the bulb socket. Strip the wires about 1/4", and attach the wire with the colored strip or ridge {it will be either-or} to the silver screw. The unmarked wire goes into the other screw.{read your instructions carefully; I'm not responsible if you blow yourself up!}


That's it! Phew! Cookie to those who made it all the way through. And some more eye candy.

I'm absolutely in LOVE with our lamp; it is so much more sophisticated than the $7 ikea standing light we had in there before. #collegeleftovers

Tuesday, June 4, 2013

creating an "oasis space" in your home


This is our retreat, our oasis. When everything in the house is insane and crazy, this is where we go to escape it. 

How do we keep it that way? Lots of hard work and determination, that's how! 

Seriously, though, five simple rules have helped us keep our space the way we want it. Keep in mind, everyone's different; these were just the rules that worked for us! 

1) Last person out of it has to make the bed. Throw pillows are not an option, but a requirement.

Turns out, my mom was right about this all along. It sounds silly, but this little habit has really changed the feel of the room. An unmade bed just looks messy and unkempt; not exactly the most relaxing thing. We want fresh! clean! The simple task of pulling the covers up and tossing the pillows back onto place makes the centerpiece of the room look well cared-for, and therefore relaxing. Works for us, anyway. It's like a hotel room: You think less of the place if your bed hasn't been made. And the pillow thing comes from hotel rooms, too; you'd never catch a nice hotel room without at least a sham pillow. Step it up; make it look nice.

Headboard and duvet cover were both early diys on the blog
2) Bedrooms are project-free zones.

Projects were the biggest cause for clutter in our room, and clutter isn't a good addition to a sanctuary! So, we kicked projects out for good. Here's the kicker, though: "project-free" includes no folding laundry {GASP!}.

I'm going full-disclosure on this one. In the past, we've been really bad about laundry. We'd only do a load about every other week, and since we were doing such GIGANTIC loads we just would run out of steam halfway through the folding process and it would all just end up in a pile. This "clean clothes pile" would collect in the corners of our room, and since the laundry bins themselves were stuffed full of dirty clothes, they'd eventually get mixed up and we'd be washing over and over and over........ Ugh.


The {boring as heck} solution that works for us: Suck it up and do a load every day {or every other day if we don't go through clothes quickly}. We have two 16-gallon Sortera recycling bins that we use as laundry bins, and they're out in plain sight in our room. We tried hiding them in the closet, but for us it seems to be out of sight, out of mind! So far, these unsightly things have been the only way we've been able to control our laundry situation. Tim brings one down and starts a load of laundry before he goes to work, I switch it to the dryer when I leave an hour later, we both fold it when we get home. BUT! The folding occurs either in the laundry room or the living room. It's never allowed in the bedroom unless it's being put immediately away. We've been doing this for about three months and it's kept our room laundry pile-free.


3) No TVs allowed.

If I watch TV in bed, I can't go to sleep in it. Plus, TVs in the bedroom are a distraction from more important things. Enough said.

4) Be intentional about the decor in the space. Make it personal and uniquely YOU. If you're short on space, make it functional, too.

For us, the best way to cut clutter was to "style" the surfaces of the room {that's really just a fancy bloggy word for decorate}. If a space or surface looks just so, I'm a lot less likely to leave my stuff there, where it doesn't belong. One or two things out of place sticks out like a sore thumb; lots of things out of place {or no "place" at all} and we just don't notice it anymore. So do it! Plus, it makes for something pretty to wake up to!

I picked colors that were inherently relaxing to Tim and I, and chose items for our dresser top that were both aesthetically pleasing as well as sentimental.  Shop both your home and the internet for inspiration. This step is important to make sure that the things you want to use will actually look good together! I created a "mood board" to make sure that it was all coherent. Pinterest is good for that, although I still am pretty partial to saving images in a file on my computer.

{1}  {2}  {3}  {4}  {5} {6} {7} {8} {9}

Pretty, right? Armed with that inspiration, I shopped my house first for items that would work, and then purchased a few things to tie it all together.


I'll revisit this mini gallery wall later this week, but here's one word that sums it up pretty wekk: FREE. The little silver tray holding the candles was a gift from a client back in our catering days {swanky, right?}, and clustered pillar candles coupled with our glitter monogram remind me of the ones we used at our wedding. Personal items.


Also in the room, we have a giant PremiƤr canvas from Ikea {from Tim's college days}, and this cute little nightstand {from my college days}. Both of these things remind us of time shared at our respective apartments and brings together our past and present. 


I swapped out the wooden pulls on the dresser for these fun bubble glass handles from World Market {
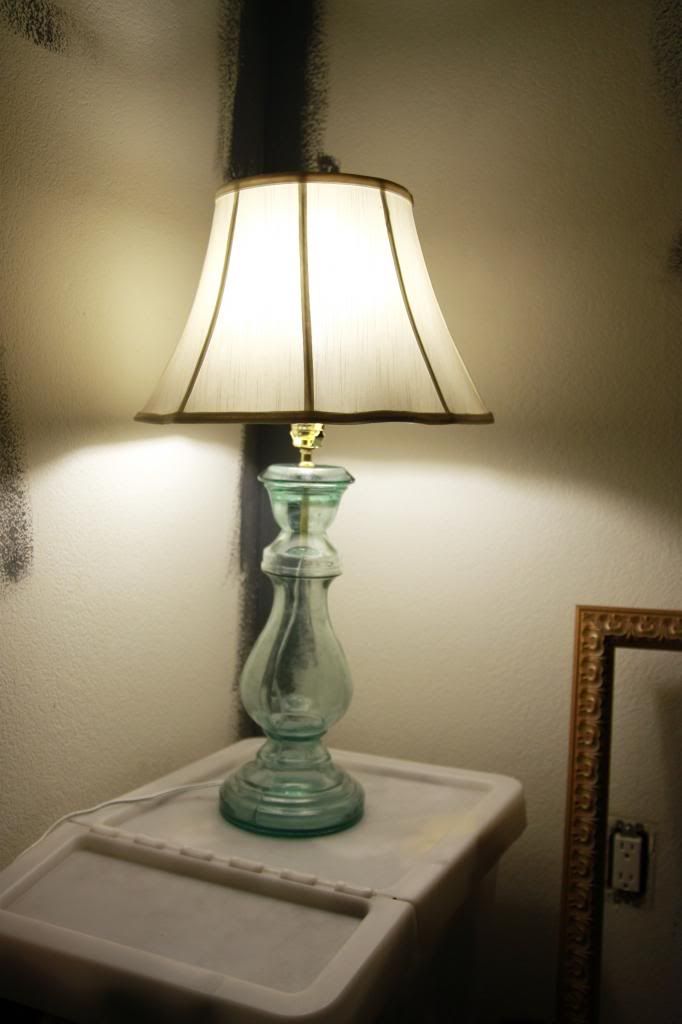
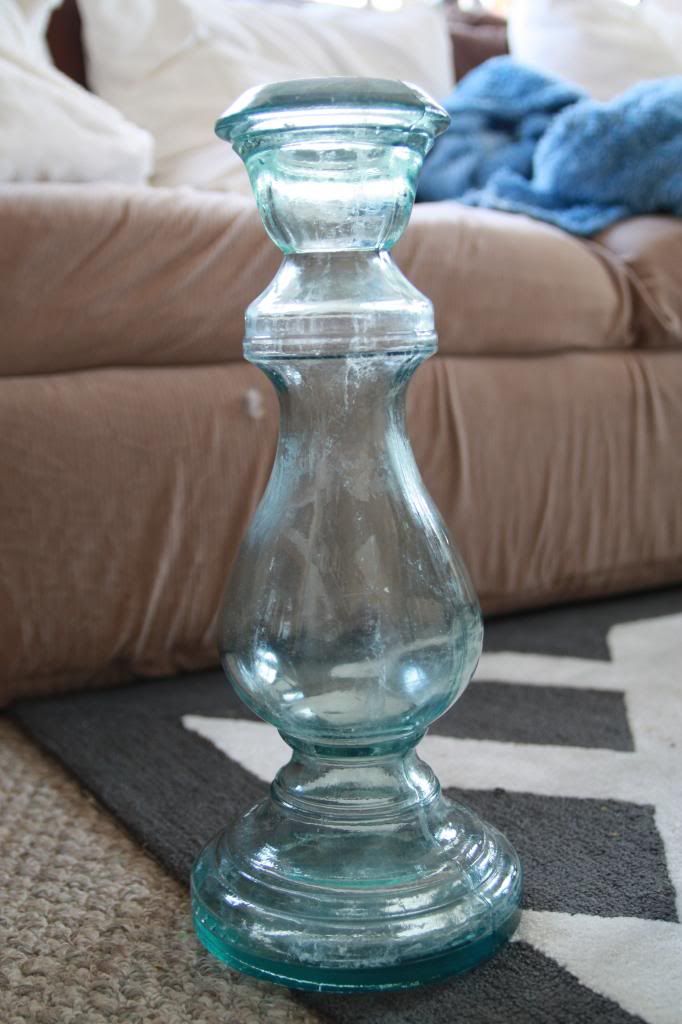
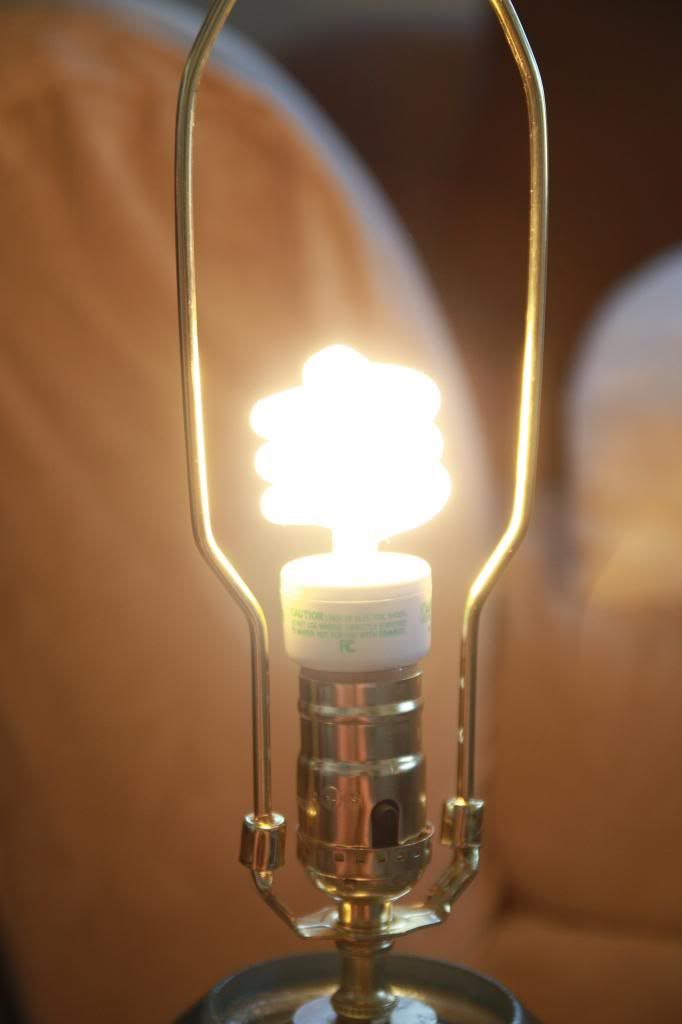
in-store only}, which tie in the color of the duvet as well as the other blues from all around the room to make everything feel more coherent. You'll also notice that the lamp in our room is different than the lamp in my inspiration photos--more about that beauty tomorrow.


5) Last but not least: In order to feel different, your room needs to smell different. 

The last way we created our sanctuary was through scent. Scent is so strongly tied to mood and memory, so our bedroom has a deliberately chosen scent that's in direct contrast with the rest of the house, so that it feels like you're leaving one world to enter another. The rest of our house smells like whatever candle we happen to be perpetually burning, but we tend to lean towards the more"relaxing" scents in our room {bergamot, sage, patchouli, sandalwood, ylang ylang, random florals. Lavender is supposed to be relaxing too, but I can't STAND it}. 

The current one we're loving right now is Bamboo by Nest. We're not normally prone to impulse-buys, but we couldn't resist it after walking into a furniture store and being enchanted by the store's "signature scent". It smelled SO good that we bought the "culprit" right on the spot, despite its $38 price tag. You guys, it was Worth. Every. Penny. It has been three months since we purchased it and it's still going strong. It's lasted way longer than a candle would, at the rate we burn candles. And isn't the diffuser pretty?

Having a signature scent for our room makes it feel extra luxurious, too, which is an added bonus! 

What about you? What "rules" do you live by in order to keep your space a sanctuary?
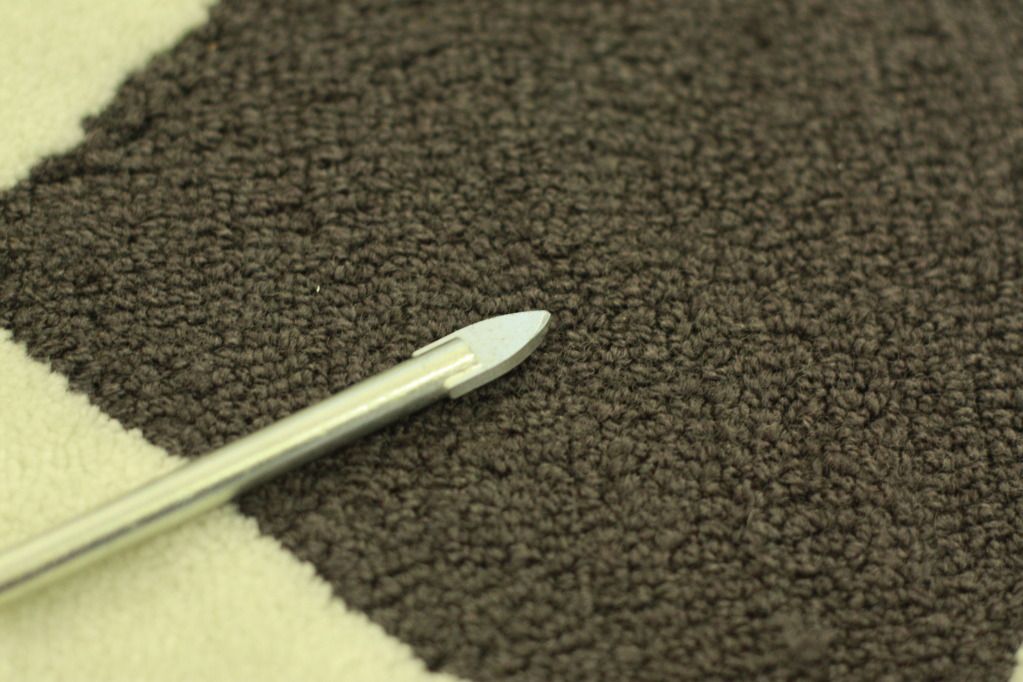
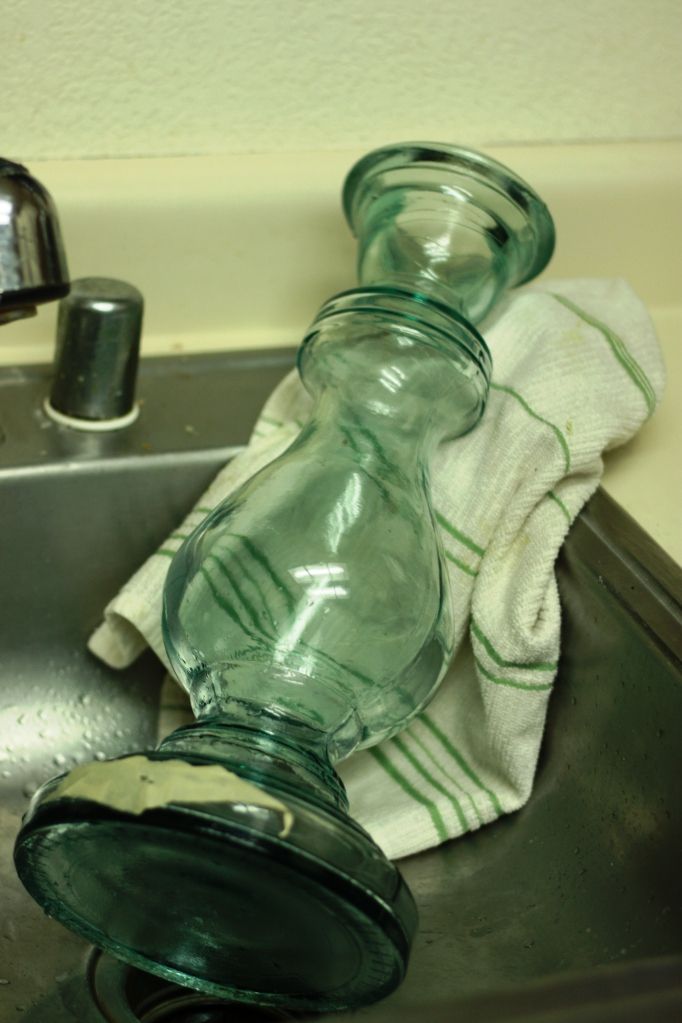
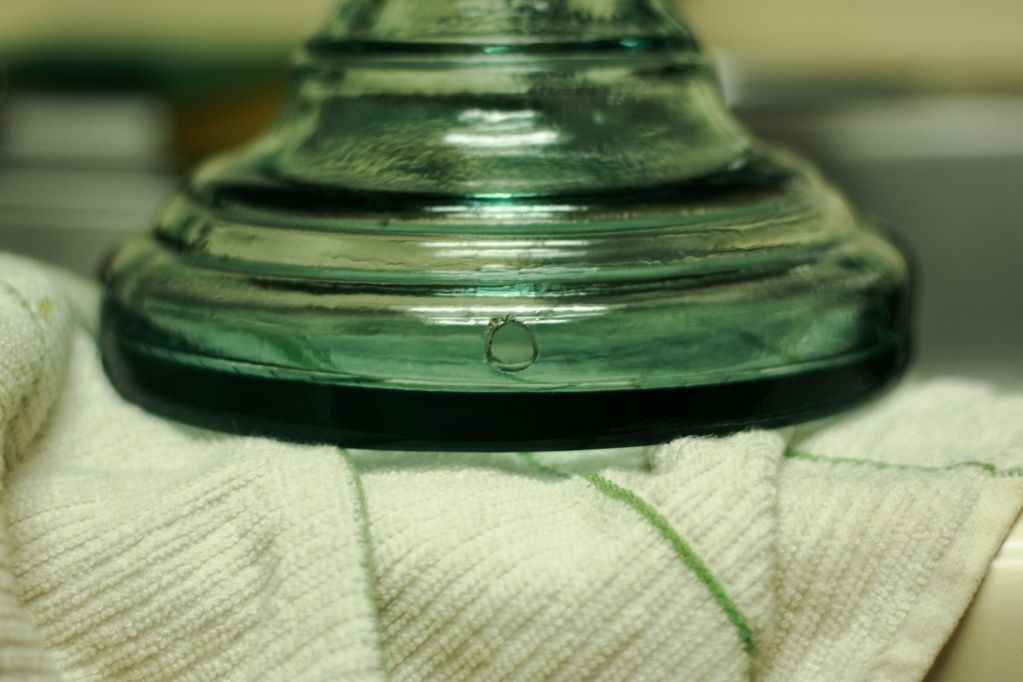
LinkWithin

Related Posts Plugin for WordPress, Blogger...