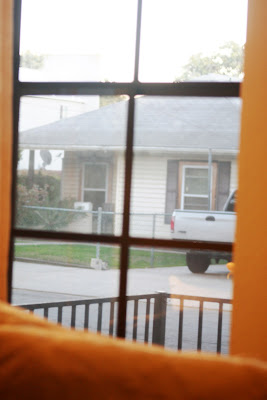
We live in the front unit of a street-level apartment, which means unless we want our living room to be a fishbowl, we have to keep curtains drawn and blinds closed pretty much all the time. While it is nice for privacy, it's so.dang.dark down there. We don't get very much natural light in the downstairs part of the house, so it's a huge bummer to block what light we do get.
So I took matters into my own hands: I frosted most of the windows on our first floor. And I used this:
Yep, you're reading that right: that's "transparent" Contact Paper. Believe it or not, that stuff isn't actually clear, but opaque. Perfect to allow elusive light {and not the neighbors} to peek into our living room. I got my paper here; it cost me about 11 bucks for a 24 feet long roll (we had a LOT of windows to cover). I bought two rolls and have lots leftover.
And it's actually a whole lot easier to apply without tacky bubbles than you might think, too. Here's what you need:
Materials:
Clear contact paper, cut to the size you need {read on to see how to "cover" a window that's larger than your contact paper roll}; Window spray; scraping tool {I used a gift card}.
Step 1. First, clean your windows. If there's even a speck of dust or fuzz, it will show, and that's tacky. Clean it well.
Step 2. Spray the pane with cleaning solution (yes, again). Really get it wet.
Step 3. Peel backing off your paper and place on window, over the solution. This will allow you to move it around in case you don't get the placement right the first time. Trim the edges more if necessary. Once you have it placed correctly, begin smoothing out the windex bubbles out. Start from the middle and move outward. You'll have to have a rag ready to clean up the windex drips. Go slowly and it won't be too bad!
That's it! If the corners don't seem to want to stick, wait a few minutes and hit it with a blow dryer. It'll soften the adhesive and peel up a little, but it smoothes right back down with your credit card. The paper may look cloudy and irregularly colored as the remaining solution evaporates away but that will even out after a day or so (seen at the top of this below photo).
One last tip. We have a large bay window in the kitchen to which I wanted to give this same treatment. Problem: it was way wider and taller than our roll. So, I cut out tesselated shapes from the vinyl that would look good with just a little space between them. Embrace those mandatory seams! I chose a simple square pattern, although a morrocan tile (below) would look pretty too. For me, simple was better. This took long enough!
my version, as seen on instagram // quatrefoil pattern via 7th House on the LeftI love this little trick, and love the change it's brought to our front room. In the summer it's the coolest room of the house; I'm excited to actually want to be down there!
Oh, and in case you're wondering, this is how much you can see from outside at night:


That greenish blob in the left-hand picture is Tim in front of the couch.
Anything not up against the window (like the bottles on the right) are really hard to see)
Love it.


I love this idea! I'm moving into my first apartment this summer, and I know I'll need to do something like this. I'm definitely going to bookmark this page for future reference.
ReplyDeleteAlso! I nominated you for an award, and I would love it if you'd go check it out! (:
ReplyDeletehttp://allisonleighann.blogspot.com/2013/03/day-198-and-award.html
love this DIY- what a great idea! I just found your blog and now am a new follower :) we are both newlyweds!
ReplyDeleteheather
heathermariebee.blogspot.com
What a great idea! I would've done the same thing to my windows.
ReplyDeleteAnd that vinyl you put on your kitchen bay window? So cute!
Clever clever girl! Looks great and I love that you spell it out soooo well. :-)
ReplyDeleteThis is absolutely awesome! I think it looks great and totally functional! It gives the room such a nice moody glow too! If we were on the first floor I would so do this!
ReplyDeleteWow! You are one talented woman! I just found your site and I just love all of your amazing ideas!
ReplyDeleteKeep it coming........
Diane