

A while ago, I introduced you to our new project, gave you a little teaser, and sneaked in a shot of the final product. Now it's time to show you how we did it!
There are tons of tutorials out there on the "interwebs" about how to do stuff like this, but since we didn't follow any of them exactly, I thought I'd post our two cents :)
First, without further ado, here is the finished product!


 Once we had all the pieces cut, we braced them together using brackets and teeny-tiny screws (that's the technical term, of course).

 ...then came around and finished the other side.
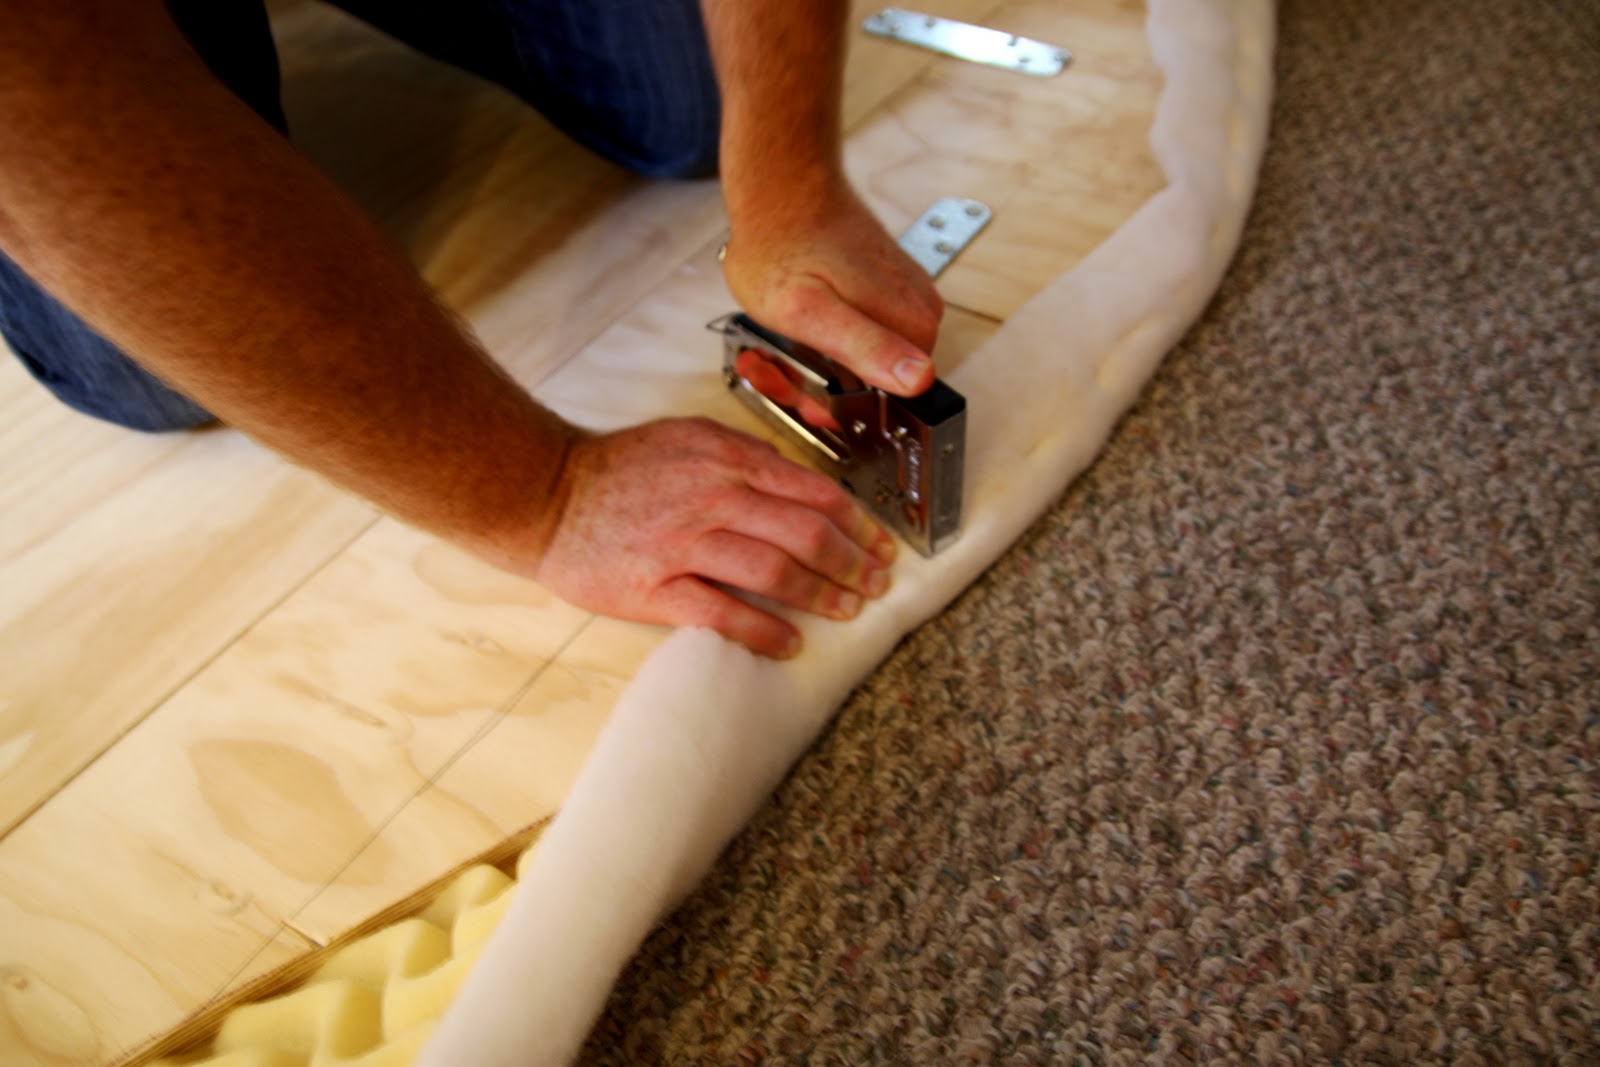
 When it came to the dips on the sides, we started in the deepest part of the dip and worked our way to the edges.
 Phew!
Phew!
 Once the foam was all attached and taut, it was time for the fabric! We'd picked up a great off-white burlap from Joann's (although grrrrr it's on sale now!). Pretty :) I loved the texture.
 We cheated a little... since the burlap wouldn't cover the whole headboard we just did the top parts...! We added some more at the bottom to cover the sides that would show, but the middle is still naked :-O.
 We stood the headboard up while wrapping the board with the fabric, to ensure that the fabric was attached smoothly and evenly. I enjoyed the view :)
 Now on to the trim! We found packages of this trim in the nail/brad section of the hardware store. They had all kinds of colors and shapes and sizes, but husband and I thought that the bronze round ones looked the best for what we were going for.
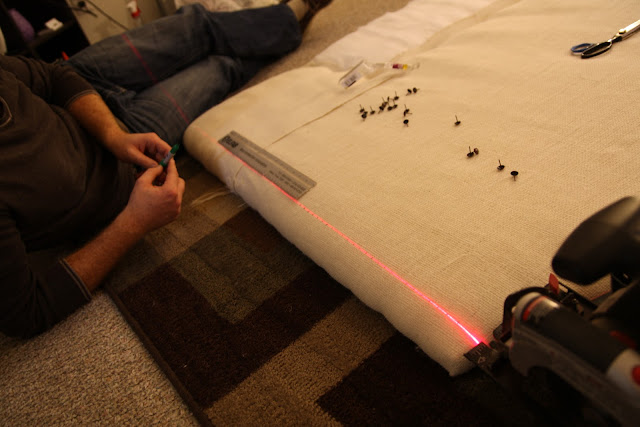
We played around to see what width/spacing looked the best (4 cm from the edge of the board, 1.5 cm from center of pin to center of pin)...
 ...and then used the laser level of Hubby's circular saw to make a straight line and mark where each pin would go.
 Going along, we hammered in every other pin, then filled in the gaps when we felt like it.
After a few minutes, we got the hang of it, but every once in a while one of the brads would go in wonky. We'd pull it out with the back of a hammer and straighten it out as we went. This picture was obviously taken before the straightening happened...!


 I think I like them.
Pin It
Shared here, here, here, and here
 |
| Pay no attention to the stuff behind the headboard! Nor to the crooked top line... erm... Might need to fix that. |
 | |
| Detail shot of the pretty fabric I found for the duvet cover. (SHHHHH I Made it out of sheets! Don't tell ;) ) |
AAAH! We love it so much. It makes us feel like grown-ups :)
Okay, on to the nitty-gritty.
We started using 3/4" plywood. We had the guys at Home Depot cut it to the right width for us because they have more precise equipment than we do :). We laid out the plywood and drew half of the shape we wanted onto the plywood. Our ideal height was a bit taller than the board we had, so we knew we'd need to piece a couple boards together.
We continually consulted Centsational Girl's tutorial, as you can see!


BZZBzZBZZ! Look at the jigsaw go! We cut the shape exactly halfway across the board, then would flip the cut part over the uncut board so we could have a symmetrical curve :)

Now came the fun (to me!) part. Although we've heard of people using just foam or just cotton batting for a headboard when using upholstery nails, we decided to use both. It was going to be FLUFFY!!!
 |
Now, I don't know if you've tried to look for foam before, but it's HARD! There are lots of different kinds. We wanted something that was thin (that would accomodate the upholstery nails we were going to use. So we used a thin-ish mattress pad. Haha.

We laid the batting down as smooth as we could get it, then put the foam on top of that, then laid the headboard bones on top of both of them. Kind of like this (minus the fabric. That came later):
 |
| source |
Then we started stapling! We started in the center and moved to one of the corners...


We played around to see what width/spacing looked the best (4 cm from the edge of the board, 1.5 cm from center of pin to center of pin)...


 |
| Slightly blurry, sorry. I'm still learning the camera! |

The curves were trickier, but we figured out a way to get 'em even-ish.
And that's it!
In other news, I got bangs again.

Pin It
Shared here, here, here, and here
Yay the bangs look great! (and obvi so does the headboard) :)
ReplyDeleteThanks girl! Miss youu
DeleteWow great job! There is a headboard from Crate and Barrel that I am obsessed with and looks exactly like that. Maybe I'll take notes from your blog post and just do it myself as well! :)
ReplyDeleteSo fluffy!!!!
ReplyDeleteAnd yes to the bangs, always a favorite:)
I love it. Especially the random last part about your bangs. Haha althought they look awesome. You guys are so creative. I am lazy and would have just bought the headboard but i can tell its way more fun to work together on the project. Love you guys!
ReplyDeletewow, that headboard looks so great. i wish i had the time, energy and creativity to do this because i'm definitely not liking my headboard at the moment!
ReplyDeletexo TJ
that is a GREAT looking headboard!
ReplyDeleteAnd the bangs look good too!!
Thanks for linking up with us!
How did you hang the headboard when you finished?
ReplyDelete