

I'm wearing "new" shoes today. I'll get to the knockoff part later.
"New" of course is the operative word. I've actually had them for about five years, see?
 Yikes. They've clearly seen better days. These shoes were totally out of my comfort zone when I purchased them, but I grew to love them and wore them with every stinking outfit.
Clearly they needed another lease on life--or a visit to the garbage can. Since I had nothing to lose, I thought they'd be perfect for a little fabric facelift! I brainstormed the kind of fabric I wanted to use to cover them {aka leisurely browsed pinterest for shoes I liked}, and came across these ones:
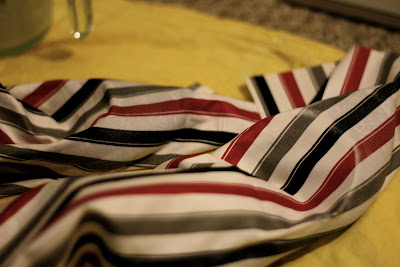
First of all, how cute is that outfit? Anyway. Back to the shoes. I loved that although the outfit was relatively monochromatic, the pattern on the shoes made it feel less blah. So, I convinced husband to make a detour to Joann's when we were visiting some family and picked up some fabric I thought would work.

I found a couple tutorials that seemed to fit the kind of shoe I had, and settled on one by Love Meagan. Here's how I did it:
I smeared a mixture of 70:30 glue and water onto the toe of the shoe (Mod Podge would have probably been better, but I don't want to buy it).
 I placed the center edge of a square of fabric onto the glued toe, making sure that the stripes were hitting at the angle I wanted.
 After smoothing the wrinkles out of the toe, I painted more of the glue mixture on top of the fabric, sealing it (kind of like papier mache..?). Then I applied more glue to the sides, smoothed the fabric, painted more glue on top. Around and around, until I was almost at the back of the shoe.
 I cut a slit down the fabric...

...and then trimmed around the "ankle" part, leaving about a half-inch for fold-over. I also trimmed as close to the sole as I could. Next, I worked on gluing down the heel part. I tucked a glove in the shoe to make smoothing the back part easier.
 I then trimmed little folding slits around the toe, smoothing the folds as tightly as I could.
 Next, I glued down the flappy parts around the top, slathered the whole thing in more of the glue mixture, and then let it dry completely. I just left it overnight
 I wanted the fabric to be a little hardier and more waterproof than, you know, glue, so I sprayed some polyacrylic sealant over everything.
 This stuff sprayed on a little milky, but dried clear. To be fair, I sprayed a TON of that stuff on there, so it probably doesn't always spray opaque... Either way it dried clear, so I'm fine with it.
 I didn't get a picture of the back-folding process, but I just glued one side down and then folded the other edge over for a smooth seam and glued that down on top.
 I have no idea if that made any sense or not... Anyway.
I wore them out and felt pretty proud of myself, but they were really.... loud? I don't know, something about the stripes and the shape didn't work as well in real life as I was hoping it would. They were cute, but they were missing something.
So I kind of just left them in the corner of the living room until I could figure out what to do with them. Husband wasn't really all that happy with me during the week it took for inspiration to strike.
BUT WAIT! Just the other day, I saw a veeeeery similar-looking shoe show up on the oh-so-fabulous shopping blog Outblush:
PERFECT! Bows always make everything better. I threw together a bow from the leftover fabric, sewed 'em on, and off we went! I'm pretty thrilled with how they turned out :)


"New" of course is the operative word. I've actually had them for about five years, see?


Clearly they needed another lease on life--or a visit to the garbage can. Since I had nothing to lose, I thought they'd be perfect for a little fabric facelift! I brainstormed the kind of fabric I wanted to use to cover them {aka leisurely browsed pinterest for shoes I liked}, and came across these ones:
 |
| Polyvore, via Pinterest |

I found a couple tutorials that seemed to fit the kind of shoe I had, and settled on one by Love Meagan. Here's how I did it:


...and then trimmed around the "ankle" part, leaving about a half-inch for fold-over. I also trimmed as close to the sole as I could. Next, I worked on gluing down the heel part. I tucked a glove in the shoe to make smoothing the back part easier.


I wore them out and felt pretty proud of myself, but they were really.... loud? I don't know, something about the stripes and the shape didn't work as well in real life as I was hoping it would. They were cute, but they were missing something.
 |
| ...meh? |
BUT WAIT! Just the other day, I saw a veeeeery similar-looking shoe show up on the oh-so-fabulous shopping blog Outblush:
 |
| J Crew via Outblush |

What do you think?
They're not exact, but what can you expect for accidental knockoffs?
To see how they held up over time, see this post here.
You are TOO clever, girl !!
ReplyDeleteWOW! You weren't joking when you said our posts were so similar! haha! Great minds, for sure! ;)
ReplyDeleteI love how yours turned out; that bow is just such an adorable detail! :)
-Jane @ urbanejane.com
Great job! Can I send mine to you??
ReplyDeleteTHESE ARE ADORABLE! I saw the Outblush post but was heartbroken that they were $200. THis is inspiring! How did you style them? I never know how to wear patterned shoes without looking too matchy-matchy...
ReplyDeleteI really wanted to see the bottoms!! How is that fabric going to wear on the soles? Super cute though, nice job Britty. Aunty L
ReplyDeleteActually, there's no fabric on the bottom! I cut it off right next to the sole. So far, so good: It's wearing a little (my feet are wider than intended for this type of shoe i think!), but it's hardly noticeable. And i've worn 'em a LOT in the past couple of weeks. ;)
DeleteWow good job, this takes a lot of skill!
ReplyDeleteum, i can't believe you made those!! so incredibly cute!!
ReplyDeletexo TJ
Those are adorable! I can't believe you made them yourself!
ReplyDelete